How to Instal Lamp on Ubuntu 18.04
What is the LAMP Stack?
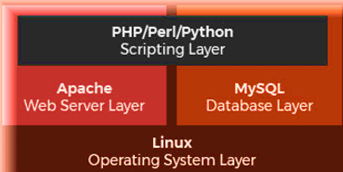
The LAMP stack is a set of open-source software used for web application development. For a web application to work, it has to include an operating system, a web server, a database, and a programming language. Each layer of software is vital for creating a database-driven and dynamic website.
The name LAMP is an acronym of the following programs:
- Linux Operating System
- Apache HTTP Server
- MySQL database management system
- PHP programming language
It is critical to install each component of the stack separately and in a specific order. Here is a step-by-step tutorial on how to install the LAMP Stack on Ubuntu 18.04.
Prerequisites
- Ubuntu 18.04 Bionic Beaver
- Ubuntu user with sudo privileges
- Access to a terminal/command line
- The apt-get tool, pre-loaded in Ubuntu and other Debian-based distros.
Installing LAMP Stack on Ubuntu
Note: This article presumes that you already have installed the Linux operating system and will not include the process for it.
Step 1: Update Package Repository Cache
Before you begin:
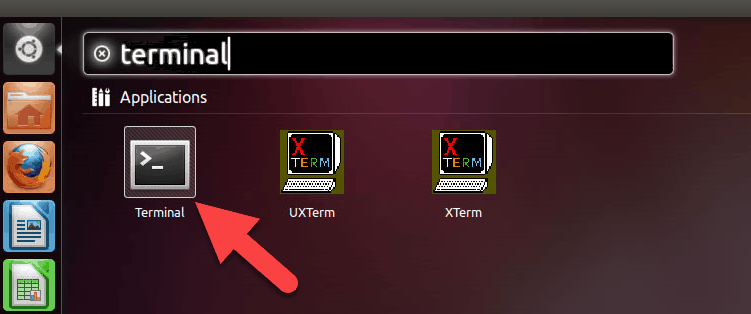
1. Open the terminal either by using the CTRL+ALT+T keyboard shortcut or by searching for the wordterminal in Ubuntu Dash.
Select the Terminal Icon, as in the image below.
2. Make sure to update the package repository cache to ensure it installs the latest versions of the software. To do so, type in the following command:
sudo apt-get update Step 2: Install Apache
1. To install Apache, run the following command in the terminal:
sudo apt-get install apache2 Press y (yes) and hit ENTER to permit the installation.
2. Check if Apache is installed correctly by running the Apache service status. Use the following the command:
sudo service apache2 status If everything installed correctly, you will receive this output:

3. Next, make sure that the UFW firewall has an application profile for Apache by typing in the following command:
sudo ufw app list In the Apache Full profile, make sure it allows the traffic on ports 80 and 443. Check this by typing the command:
sudo ufw app info "Apache Full" You will see the output as in the following image:

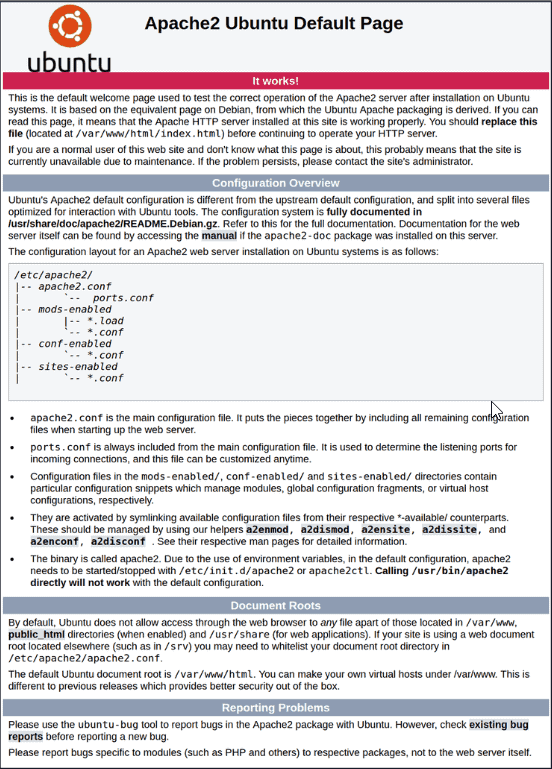
4. To ensure Apache is running, enter the IP address of your server in the address bar and press ENTER.
The test Apache web server page should display as below.
Note: To identify the server's public IP address, run the command:
sudo apt-get install curl curl http://icanhazip.com Step 3: Install MySQL and Create a Database
To install MySQL, type in the following command:
sudo apt-get install mysql-server Press y to allow the installation.
During the installation, you will be prompted to set the root user password.
Note: Although it is not mandatory to set the root password, it is recommended as a precautionary safety measure.
Step 4: Install PHP
1. To install PHP, run the following command:
sudo apt-get install php libapache2-mod-php php-mysql Press y and ENTER to allow the installation.
2. Next, you should modify the way Apache serves files when directories are requested. By default, Apache first looks for a file card named index.html. However, we want it to look for the index.php file instead.
To change this, open the dir.conf file in a text editor with root privileges:
sudo nano /etc/apache2/mods-enabled/dir.conf In the configuration file, you will see the information as in the image below:

Then, move the PHP index file to the first position:

3. Press CTRL + X to save and close the file. Press y and ENTER to confirm.
Step 5: Restart Apache
For the changes to take effect, you must restart the Apache service.
Enter the command:
sudo systemctl restart apache2 Optional: Install PHP Modules
You can add more modules to improve the functionality of PHP. You can search through a variety of libraries and modules by piping (listing in chunks) the results of the apt-cache search into less, allowing to scroll through the output of other commands.
1. Type in the following command:
apt-cache search php- | less 2. Once you open it, scroll up and down by using the arrow keys to see all the options, including a short description for each module.
For example, to find out what the module php-cli does, type:
apt-cache show php-cli This command displays the description of the module. If you decide to install the package after viewing its description, you can do so by using the following command:
sudo apt-get install php-cli 3. When you finish, press q to quit.
Step 6: Test PHP Processing on Web Server
1. Create a basic PHP script and save it to the "web root" directory. This is necessary for Apache to find and serve the file correctly. This directory is located at /var/www/html/.
To create a file in that directory, type in the following command:
sudo nano /var/www/html/info.php This command opens the bank file.
2. Inside the file, type in the valid PHP code:
<?php phpinfo (); ?> 3. Press CTRL + X to save and close the file. Press y and ENTER to confirm.
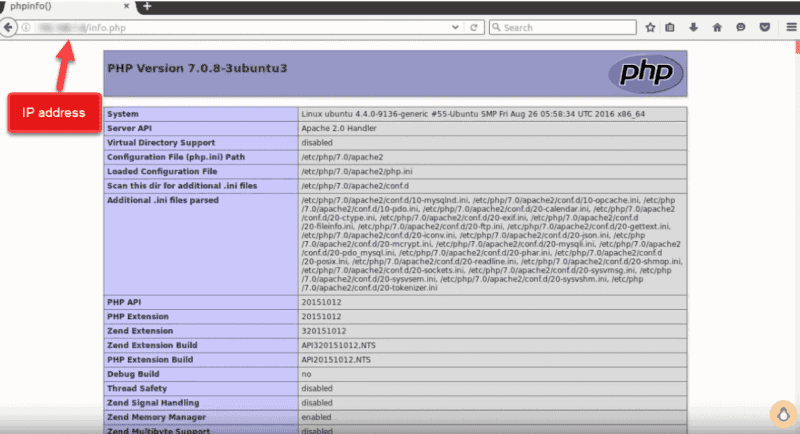
4. Open a browser and type in your IP address/info.php
The output should display the details of the LAMP stack, as seen in the image below:
Conclusion
By following this guide, you successfully installed each layer of software required to build the LAMP stack on Ubuntu 18.04.
With it, you have everything necessary for web application development.
Was this article helpful?
Yes No
How to Instal Lamp on Ubuntu 18.04
Source: https://phoenixnap.com/kb/how-to-install-lamp-stack-on-ubuntu